
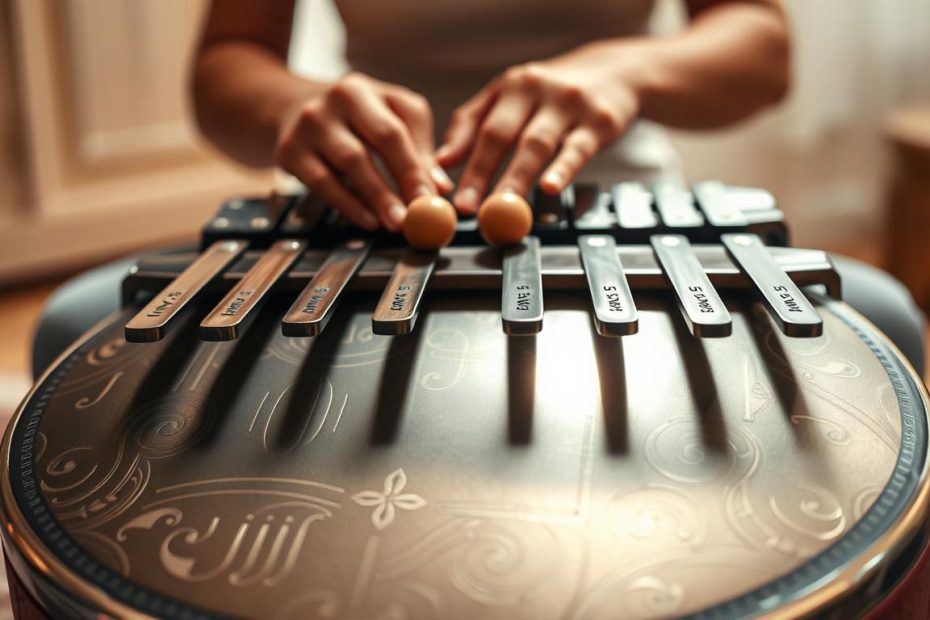
This article sets out a structured guide to understanding the anatomy, scales, and methods for identifying the notes of a tongue drum.
The modern tongue drum emerged in 2007 thanks to Dennis Havlena. He turned a propane tank into a musical instrument capable of producing soothing sounds that are popular for relaxation and meditation.
You will discover why the physical limit on the number of notes shapes the choice of keys. Most notes fall between the 3rd and 5th octaves; the size of the tongues affects their pitch.
Practical methods: an electronic tuner, visual markings, and magnets beneath the tongues for small adjustments.
Concrete examples, such as a 15-note model in C major, will connect theory with practice. To learn more about models and buying one, see this specialist article.
The goal: move from curiosity to confidence with practical advice for beginners and experienced players alike.
Introduction to the tongue drum and its notes
A melodic and percussive instrument, this small idiophone appeals to players with its simplicity and soothing sound.
Shape and operation: it is a circular drum made of steel or an alloy, with tongues cut into its surface. These tongues vibrate when struck with fingers or mallets, while the resonance chamber naturally amplifies their vibrations.
A melodic percussion instrument with soothing sounds
Accessible without prior experience, this drum produces gentle, captivating sounds. Its tuning lets you start playing immediately.
Why notes matter to beginners and musicians
Notes give structure to what you hear and guide creativity. They make it possible to improvise without worrying about wrong notes and to progress with confidence.
“The tuning and simplicity of this instrument make it easier to connect a musical idea with the sound you produce.”
| Feature | Effect | Use |
|---|---|---|
| Circular shape | Ergonomic arrangement of the tongues | Meditation, studio |
| Precisely sized tongues | Stable, harmonious notes | Improvisation, accompaniment |
| Playing with fingers or mallets | Variable tone and sustain | Performance, well-being |
For more on how to use the instrument and choose a model, the following sections explain its structure, scales, and the criteria for choosing one that suits your goals.
Anatomy and operation: tongues, surface, and resonance
The construction of the top and its tongues largely determines a tongue drum’s tone. This physical foundation governs how the percussion instrument projects its notes.
Tongue structure and the role of the resonance chamber
The circular upper surface is cut into precisely sized tongues. These are the sources of the vibrations.
Beneath the top, a circular opening contributes to resonance: it amplifies vibrations, projects sound, and enriches the natural harmonics.
Materials and sound quality: steel, alloys, and wood
Steel and stainless steel offer a clear tone and good resistance to corrosion. Refined alloys improve stability.
Wooden models have a more organic timbre. The shift from gas tanks to manufactured parts has allowed greater control over precision.
How tongue size relates to frequency and pitch
The longer and heavier a tongue is, the lower its frequency and pitch. Conversely, smaller tongues produce higher notes.
The cutting method, whether laser or manual, and the shape of the pattern affect stability and clarity. Playing with fingers or mallets changes the attack and length of the sustain.
- Acoustic basics: mass, elasticity, and the cut determine pitch.
- Visual markings help you aim for each tongue or group of tongues.
Number of notes, octaves, and practical limits
A drum’s usable surface naturally limits how many notes it can accommodate. Each tongue needs enough room to vibrate freely. On a small surface, clarity takes priority over quantity.
In practice, models range from 7 to about 20 notes. Compact versions often offer 7 to 11 notes. Larger instruments may have around 15 to 20 notes.
Most playing uses the 3rd, 4th, and 5th octaves. This range offers a balance of depth and clarity.
- Physical limit: each tongue takes up space on the surface.
- More notes mean tongues are closer together, requiring greater accuracy when playing with fingers or mallets.
- Notes spread across several octaves expand melodic possibilities and make the layout easier to play.
| Type | Typical number | Advantage | Limitation |
|---|---|---|---|
| Compact | 7 to 11 | Easy to carry and play | Limited harmonic range |
| Medium | 12 to 15 | Good balance of depth and clarity | Requires accurate striking |
| Large | 16 to 20 | Wide melodic range | Closely spaced tongues can produce unwanted sounds |
Bear in mind: some models have variations in the balance between low and high notes. Your initial choice of layout determines your harmonic options.
Understanding tongue drum scales and keys
The chosen scale gives a tongue drum its immediate character and guides your improvisation.
Pentatonic, diatonic, and chromatic: differences and uses
Pentatonic: five notes per octave. Ideal for starting out and improvising with little risk of a clashing note.
Diatonic: seven scale degrees. It opens up a more varied repertoire and helps you learn intervals.
Chromatic: twelve semitones. It offers a full range of notes for exploring different sounds and modulations.
Popular keys and evocative modes
Popular keys include C major and D minor. They provide familiar starting points and make it easier to play with other instruments.
Modes such as Akebono, Pygmy, Hijaz, and Celtic offer unusual variations and musical colors from other traditions.
Spreading the same notes across several octaves
In a pentatonic scale, the same five notes can recur across two or three octaves. This creates fluid melodic paths around the surface.
The coordination of fingers and mallets varies with the scale: fingers allow delicate attacks, while mallets extend the sustain.
“A good key provides a clear foundation: the tonic anchors every phrase you play.”
| Scale | Number of notes | Recommended use |
|---|---|---|
| Pentatonic | 5 | Well-being, improvisation |
| Diatonic | 7 | Learning scale degrees, varied repertoire |
| Chromatic | 12 | Full exploration, arrangements |
Complete guide to understanding tongue drum notes
This chapter offers a clear approach to exploring the instrument’s anatomy, scales, keys, and methods of identifying notes.
Before buying, remember the essentials: a range of 7 to 20 notes, often spread between the 3rd and 5th octaves, and the influence of tongue size on pitch.
The suggested learning method is simple and gradual: listen to each note, identify it with a tuner, record its position, and then learn the layout through repetition.
Always connect theory with practice. Try short exercises on the drum: find the tonic, play pentatonic sequences, and then try diatonic patterns.
Use this article as a quick reference for terminology and visual cues, such as markings numbered 1 to 7. Your ear is essential too: listen to the character of the scale and locate its tonic.
“Listen first, then reproduce what you hear: musical memory grows through use.”
To put this into practice and learn to read sheet music and numbered markings, see this practical article.
- Goal: progress gradually from recognizing notes to playing expressively.
- Tip: spend 5 to 10 minutes a day on simple patterns.
Identify the notes on your instrument step by step
Before listening closely, set the reference pitch and find a quiet space. This simple step makes detection more accurate and prevents errors caused by background noise.
Using an electronic tuner and setting the reference pitch
Use a chromatic tuner and select 432, 440, or 528 Hz according to your instrument. Strike each tongue in turn, write down the displayed note, and record its position.
Visual method: markings, numbers 1 to 7, and tonics
Find the numbers 1 to 7 on the surface: 1 represents the tonic. Small dots above or below a number indicate the octave.
C-to-B conversion charts and a beginner’s procedure
Check the letter marked beneath the instrument, such as C for Do or D for Ré. Draw a diagram of the surface and add each note you identify.
- Prepare the room and tuner.
- Set the reference pitch.
- Play gently with fingers or mallets and record each pitch.
- Check that the sequence from 1 to 7 matches the key, such as 1 for D and 3 for F-sharp.
“Sing the tonic and repeat it slowly: memory develops through active practice.”
| Common problem | Solution |
|---|---|
| Incorrect reference-pitch setting | Try different frequencies |
| Background noise | Find a quieter room or record later |
| Neighboring tongues vibrating | Dampen their vibrations or strike more precisely |
For practical advice and examples of note equivalents, see this guide to tongue drum notes.
How tuning reference affects pitch: 432, 440, and 528 Hz
A note with the same name can seem warmer or brighter depending on whether the instrument uses a reference of 432, 440, or 528 Hz.
Reference-pitch measurement: 440 Hz is the modern standard. 432 Hz and 528 Hz are alternatives. The measurement specifies a reference in hertz without changing the names of the notes.
What the reference changes without changing note names
For example, C4 with a 432 Hz reference will sound lower than C4 with a 440 Hz reference. The names stay the same, but the pitches differ.
Compatibility and tuner settings
A tongue drum tuned with a 432 Hz reference will sound out of tune alongside one using 440 Hz. As a rule, set your tuner to the drum’s reference frequency in hertz before identifying its notes.
- Check the frequency specified by the manufacturer.
- Record that value and set the tuner accordingly.
- Test the tonic against a tone generator or tuned piano.
The difference can be troublesome when playing music in a group or making a multitrack recording. Striking with fingers or mallets does not change the intended pitch, but it can make tuning differences more noticeable.
“Using the right reference pitch prevents unnecessary dissonance and keeps the musical experience consistent.”
Playing techniques and their effect on perceived notes
Touch can dramatically change a tongue drum’s sound. Playing with fingers produces warm nuances but requires accuracy to avoid damping the resonance.
Fingers or mallets: attack, sustain, and expression
With your fingers, the attack is gentle and organic. Subtle changes in volume suit intimate melodies.
Rubber or felt mallets produce a clearer attack and longer-lasting sounds. They suit beginners and situations where the sound needs to carry further.
Controlling sustain and harmonics
The part of the surface you strike and the hardness of what you use affect the attack, brightness, and duration of each note.
To avoid damping the sound, lift your fingers quickly, strike the tongue at its best sounding point, and let it ring. To shorten a note, gently place your palm on the instrument between strikes.
- Alternate your right and left hands to steady the rhythm.
- Vary the force and angle of each strike to reduce unwanted harmonics.
- Choose mallets to suit the setting: felt for a soft sound, rubber for a clear one.
Short, regular practice sessions of 10 minutes a day are enough to refine your touch and gain better control of sustain.
To compare the instruments and their uses, see handpan vs tongue drum.
Choose a model for its scale, key, and intended use
To choose an instrument, first decide how you will use it and what kind of sound you want.
For well-being and meditation, players often favor a pentatonic scale. These models are easy to play and suit relaxation.
Performance and studio work call for more notes and versatility. A 15-note instrument in C major covers a broad repertoire and suits beginners as well as musicians.
Practical examples
A common example is the 15-note tongue drum in C major. You can use it to accompany songs and learn to play.
Pentatonic models remain ideal for improvisation and encourage creativity without requiring much theory.
A simple selection method
- Define its use: meditation, practice, or performance.
- Choose a scale and key that suit your plans.
- Set a budget and, if possible, listen to the instrument through headphones.
What to look for: stable tuning, clear attacks, and consistent notes across the tongues.
Finally, remember that most instruments have fixed tuning; some allow adjustments with magnets. That is useful if you want to make small changes.
Tuning possibilities, magnets, and changes in sound
Adding a little mass can subtly lower a tongue’s pitch. This is useful when a note sounds too high or you want to adjust a key slightly.
Principle: placing a weight beneath a tongue increases its effective mass. Its frequency drops, lowering the note. These are small corrections; they cannot radically transform the instrument.
Materials and method
Neodymium magnets are often used and positioned carefully to preserve the quality of the vibration. They may be glued on or held in place with suitable supports.
Work gradually: record the initial tuning, add a magnet, test the note with fingers and then mallets, and measure its pitch with a tuner. Write down each step.
- Ask the manufacturer whether your model can be adjusted.
- Start with very small magnets.
- Check the tuning of the whole instrument after each change.
Limits and precautions: modifying some models will compromise their sound. A poorly judged adjustment can reduce sound quality. If needed, consult a specialist instrument maker.
“Adding weight is a way to fine-tune an instrument, not a substitute for choosing the right scale and key in the first place.”
Musical inspiration: patterns, melodies, and creativity
A short pattern, repeated and then changed, is often enough to create an expressive melody.
Create groups of 3 or 4 notes in a pentatonic scale. They establish the tempo and give the music room to breathe.
Build a melody: gradually vary the intervals, repeat patterns, and then shift their timing slightly to create movement.
Alternate between fingers and mallets to change the attack and density of the sound. This encourages creativity and adds tonal variety.
Develop expression through dynamics, silence, and control of sustain. Giving a phrase room to breathe gives it meaning.
Short forms, such as loops of 8 to 16 beats, provide a starting point. Develop them with small additions.
- Explore comfortable paths around the instrument’s shape.
- Playing a pattern over guitar or piano accompaniment helps you hear how the tones blend and find your place in the music.
- Record and write down your ideas so you can refine them later.
“Listen to what moves you and turn it into your own way of playing; that makes every phrase unique.”
| Goal | Technique | Result |
|---|---|---|
| Establish the tempo | Repeat a group of 3 or 4 notes | A steady rhythm with room to breathe |
| Create a melody | Vary intervals and shift the timing slightly | A flowing, expressive phrase |
| Vary the tone | Use fingers or mallets and change the dynamics | Nuance and richer sounds |
Conclusion
In summary: a few key points will help you get started with confidence.
The essentials are anatomy and resonance, the relationship between tongue size and note pitch, and the limits imposed by the surface area. These factors help explain why most models cover the 3rd to 5th octaves.
Choose a scale that suits your purpose, whether well-being, learning, or performance. Identify the key with a tuner and use the numbers 1 to 7 to learn the note layout.
When playing in a group, make sure you use the same reference pitch, whether 432, 440, or 528 Hz. A 15-note model in C major remains a good compromise if you want versatility.
Regular practice will help you apply the advice in this article and use the instrument to express yourself, whether you are a musician or simply curious.