
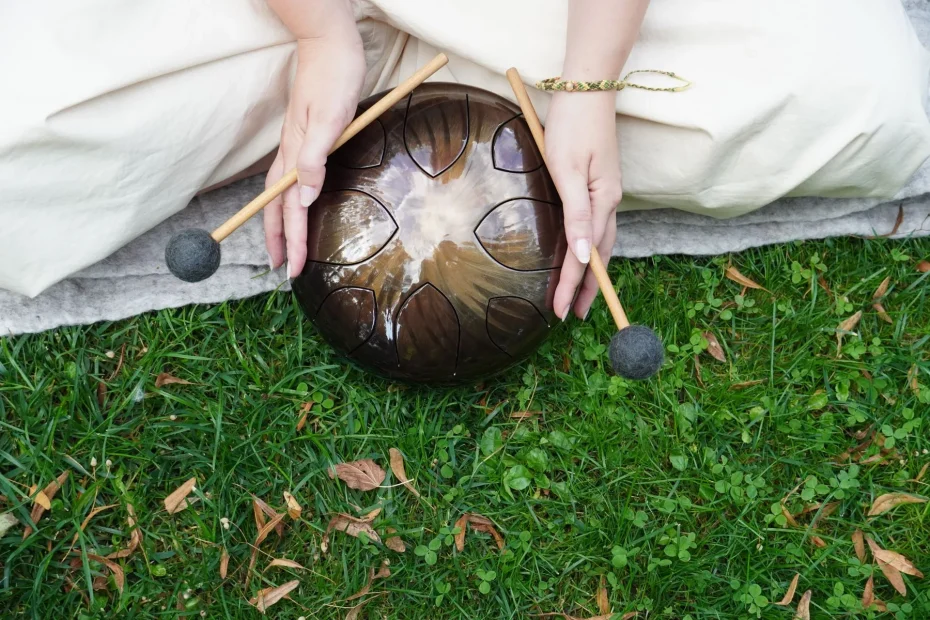
Goal: give you a clear, gradual plan for learning to play an 8-note tongue drum that you can start right away and enjoy without too much theory.
This instrument is approachable and invites you to explore sound. You can learn the first movements quickly, and playing can help you relax.
On our site, the learning path covers getting started, posture tips, patterns for each hand, playing through a scale, and short melodies.
Online resources complement the guide: multiple camera angles, animated sheet music, and immersive videos to help you see how the patterns fit together.
Mindset matters too: no pressure, just healthy musical habits that help you improve over time.
After a few minutes of practice, you should be able to keep a steady beat, produce a clean sound, and sketch out your first improvisation.
Get your instrument ready, sit comfortably, and breathe, then move on to the first chapter.
Start gently: tutorial goals and mindset
Goal: establish a clear, reassuring foundation for learning. Treat this lesson as a simple framework for making quick, tangible progress.
A gentle, gradual approach: breathe before playing, relax your shoulders, then move slowly. This pace helps your body remember the movements and lets the music emerge naturally.
Practical principles:
- Set one small goal for each session, such as keeping a steady beat for 5 minutes.
- Accept mistakes: each attempt teaches you to listen to the instrument and its resonance.
- Use improvisation as a thread through your practice to nurture your enthusiasm and move beyond habitual patterns.
Adjust the tempo to suit your energy that day. Regular practice is more valuable than an occasional intense session.
Keeping a practice journal helps you track how you feel and how you improve. Note the scale you tried, one impression, and one small success.
Hold and strike the instrument for a clean sound
Sound quality depends first on how you hold the instrument and strike its notes. Place the tongue drum on your lap or on a stable stand. Make sure its body can vibrate without contact that muffles the sound.
Position and posture: relax your shoulders, keep your elbows near your body, and let your wrists stay loose. Let your hand fall naturally without forcing it; use a relaxed strike to produce a clear note.
Fingertips, finger pads, and rebound control
Use the pads of your fingers for a clean tone. Keep the movement short: strike clearly, then let your finger rebound. Do not leave it pressed against the instrument after contact. A light strike reduces unwanted noise and keeps the volume steady.
Practice with one hand at a time while watching a video filmed from above to coordinate your left and right hands. Film yourself to spot common mistakes: striking too hard, stopping the rebound, or tensing your wrists.
- Mini exercise: 10 strikes with each finger, alternating between your index and middle fingers.
- Active listening: adjust where you strike to balance clarity and resonance.
Breathe between sets: this technical foundation will support all your future playing. To explore related instruments, discover these saucer-shaped instruments.
8-note tongue drum tutorial: very simple exercises
Start by establishing a simple beat as the backbone of your practice. Playing with your left hand alone on the strong beats, using quarter notes at a slow tempo, steadies your rhythm and breathing.
Left-hand exercise: a steady beat on the strong beats
Strike the same note at even intervals. Count softly, “1 and 2 and 3 and 4 and,” to keep time.
Use a metronome at 60 bpm, then increase the tempo in stages. Record the speed at which your playing stays clean in a lesson notebook.
Right-hand response exercise (call & response)
Have your right hand respond first on the same note, then on a neighboring note to make a short phrase. This exchange develops coordination and listening.
Alternate your right and left hands on two neighboring notes
Alternate your index and middle fingers to spread the effort. Aim for the same volume and tone with both hands.
Play through each note of the scale in a simple line
Play each note of the scale from lowest to highest, then return in the opposite direction. Leave the same amount of time between strikes.
- Add more or less pronounced dynamics: one soft strike, then one strong strike.
- Finish with 1 minute of free playing on two notes to improvise without pressure.
Tip: the videos show these sequences from several angles, with animated sheet music so you can follow the notes on screen. For a more complete guided path, see the beginner lessons.
Free your playing: first improvisations without judgment
Free your playing by treating mistakes as creative possibilities.
The brain repeats patterns to save effort. That is normal. Recognizing this tendency helps you move beyond it and expand your comfort zone.
Move beyond habitual patterns
- Limit your range to 3 to 5 notes from the same scale so you can listen more closely.
- Alternate between free playing and moments of silence to give your music shape.
- Record 30 to 60 seconds of playing and listen back to how your patterns develop.
Guided improvisation in four beats
Choose a low anchor note. Over four beats, let your left hand establish the anchor and your right hand respond. Improvise around 3 or 4 notes, then return to the anchor note to keep a musical thread.
Listen actively to tone and musical breathing
Inhale before the first beat, then exhale as you play. This instrument responds well to gentle strikes: explore the character of its sounds instead of focusing on speed.
| Technique | Duration | Goal |
|---|---|---|
| Anchor note over four beats | 2 min | Maintain a musical thread |
| Limited range (3 to 5 notes) | 2 min | Listen to the sounds |
| Call and response between left and right hands | 1 min | Coordinate and return to the anchor note |
| Short recording | 30 to 60 sec | Reflect on your playing and keep it enjoyable |
Conclusion: 5 minutes of mindful improvisation each day can change your relationship with music and increase the pleasure of playing.
Easy rhythms and patterns you can play right away
A short ostinato steadies the rhythm and provides a foundation for learning. It is a small pattern repeated over 1 or 2 measures. It helps you remember sequences of notes and coordinate alternating hands.
Ostinatos with varied dynamics (quarter and eighth notes)
Start with a quarter-note ostinato: L – L – R – L. Play slowly and count the beats.
Then switch to eighth notes to feel the subdivision. Practice more or less pronounced dynamics by alternating a soft strike with a stronger one.
An alternating-hand pattern, then a variation
Establish a pattern: L – R – L – R, alternating hands. For a simple variation, move the last note to the next subdivision.
At first, use the metronome on every beat. Then set it to beats 2 and 4 to strengthen your internal sense of timing.
Add a rest to give the phrase shape
Add a one-beat rest at the end of a measure to let the phrase breathe. That space highlights the instrument‘s resonance.
- Quarter-note ostinato.
- Switch to eighth notes.
- Add a rest.
- Slightly vary the rhythm of the last note.
Technique: lift your fingers slightly, let them rebound freely, and keep your wrists loose for clear articulation.
Lesson tip: write down a comfortable tempo and your favorite pattern. Finish with 30 seconds of improvisation over the ostinato, changing just one note to add variety.
Arpeggios and short melodies on an 8-note tongue drum
Play three or four neighboring notes to create a stepwise arpeggio. Start on the lowest and move to the highest, then come back down. Keep the flow steady.
Practice with a slow metronome and connect the strikes lightly for a singing feel. Aim for a soft, even touch with your fingers. Subtly accent the first strike of each measure.

A short guided melody
Build an A-A-B-A melody. Change just one note in the B section to create a memorable contrast. Adapt the melody to your scale: Happy scales emphasize bright notes, while Nature and Zen favor airy intervals.
- Let the phrase breathe: leave a brief rest after each long note.
- Glance briefly at each note, then listen to its resonance.
- Memorize the melody in groups of 2 measures before joining them together.
| Step | Duration | Goal |
|---|---|---|
| Stepwise arpeggio (3 or 4 notes) | 2 to 3 min | Steady flow |
| A-A-B-A melody | 3 to 4 min | Create a small contrast |
| Arpeggio inversion (variation) | 1 to 2 min | Surprise the ear |
| Free improvisation | 1 min | Use the patterns you have learned |
Tip: for visual guidance and animated sheet music, follow an online learning path and use its multiple camera angles. You can also learn more from this practical guide: how to play the handpan.
Video tutorials, multiple camera angles, and animated sheet music
Lessons filmed from above make movements easier to reproduce. They show each pattern gradually and let you clearly follow the teacher’s left and right hands.
Follow on-screen notes to coordinate your eyes and hands
Animated sheet music: identify the next note on screen before moving your hand. This helps you anticipate the movement and avoid hesitation.
Watch the video once without playing. Then replay it in a loop and play slowly to match its rhythm and articulation.
Use an immersive view to copy the movements
An overhead view matches your own perspective. Your left aligns with the instructor’s left, making sequences easier to copy.
Step-by-step method: observe, play slowly, repeat three times without mistakes, increase the speed slightly, then reinforce the pattern. Pause the video after each pattern to settle your finger positions.
- Use four-measure loops to steady the rhythm.
- Multiple camera angles show how high to lift your fingers and the angle of each strike.
- Note the scale markers shown on screen to remember the visual layout.
| Tool | Use | Result |
|---|---|---|
| Immersive overhead view | Observe aligned hands | Easier imitation |
| Animated sheet music | Follow the note on screen | Anticipate movements |
| Multiple camera angles | Analyze finger lift and rebound | Improve your strike |
In short: pairing these videos with a written guide and sheet music helps you become independent sooner. Combining listening and watching reduces coordination errors and makes practice time more effective.
Intuitive notation, an exercise e-book, and progress
A simple visual code helps you turn a written pattern into an automatic movement.
Notation: colors, symbols, and numbers show which tongue to strike. You do not need to read music: a glance is enough to start playing.
Learning benefit: this approach reduces the mental effort required and speeds up learning repeated patterns. You can focus on listening and feeling.
The included tongue drum e-book offers exercises arranged by level. You can print or download it to practice offline.
The online progression follows a clear path: basic movement → short patterns → longer phrases. Each lesson gives you a simple goal to complete.
- Routine: tick off an exercise after three successful attempts in a row, then move on.
- Pair animated sheet music with color-coded notation to give yourself two visual guides.
- Add notes to your lessons about tempo, difficulties, and your own useful tips.
Independent practice: without any theory prerequisites, repeat the exercises wherever you like and follow the four-week plan: 3 practice sessions and 1 guided improvisation session each week.
Avoid common mistakes and play more smoothly
A few simple adjustments can make hesitant playing steadier.
Learn to spot common mistakes quickly: striking too hard, speeding up unintentionally, or leaving your fingers against the instrument after contact.
Correct your technique: lift your fingers less, strike with their pads, and let them rebound. Relax your wrist for clean notes.
Manage force, tempo, and repetition
Play a pattern slowly three times without a mistake before increasing the speed in small steps. Try a “silent” metronome exercise: play for 2 measures, then let 2 measures pass in silence to check your internal timing.
Watch for symmetry between your right and left hands. Aim for a similar finger lift and volume to achieve an even tone.
- Adjust your strike to the tongue: striking slightly off-center can sometimes enrich its sound.
- Repeat short sequences of 2 to 4 notes to work on a difficult passage before returning to the complete pattern.
- Practice in short, regular sessions. Gently stretch your fingers between sets to help prevent fatigue.
At the end of a session, play freely for one minute in the same scale at a moderate tempo. A beautiful, steady sound is more valuable than poorly controlled speed.
Go further: scales, online lessons, and communities
Finding the right scale makes improvisation easier and inspires new ideas. The learning paths on the site offer original melodies for the Happy, Zen, Nature, and Tribal scales.
Explore the character of different scales
Happy sounds brighter. Zen and Nature create calmer moods.
Tribal favors earthier textures. Choose according to your musical taste.
Formats, resources, and progress
Two formats: an individual course (lifetime access) or an Unlimited Pass (all courses, annual masterclasses, and live workshops).
Resources include immersive videos, intuitive notation (colors, symbols, and numbers), and an exercise e-book. The step-by-step guide works with any instrument model.
Community, compatibility, and confidence
- Conversations with other players, live workshops, challenges, and coaching provide useful feedback.
- Handpan/tongue drum compatibility: the learning paths are designed to adapt easily.
- A 14-day money-back guarantee gives you reassurance when purchasing.
| Option | Benefit | Who it is for |
|---|---|---|
| Individual course | Focused content, lifetime access | Learners who want to focus on one subject |
| Unlimited Pass | More content and masterclasses | Curious and regular players |
| Community | Feedback and motivation | People who enjoy sharing |
Reviews: learners praise the clear teaching, short lessons, and welcoming atmosphere. To begin, follow a foundational module, choose a scale that appeals to you, then alternate between technique and short melodies.
Conclusion
As you finish this learning path, remember the essentials that will help your playing improve each day.
You have laid the groundwork: posture, touch, rebound control, a steady beat, and alternating hands. These skills help you build patterns and begin improvising.
Next, strengthen those skills with arpeggios and short melodies, then explore each scale to shape your sound. Ten minutes a day can be enough to learn to play and bring beautiful melodies to life.
Use the lessons, e-book, beginner lessons, or learning tips to review the details with videos and animated sheet music.
Listen more closely: a simple, well-paced phrase is better than rushed playing. Share your thoughts with other players, alternate focused practice with free playing, and today, pick up your tongue drum, choose three notes, play slowly, and let the music settle.