
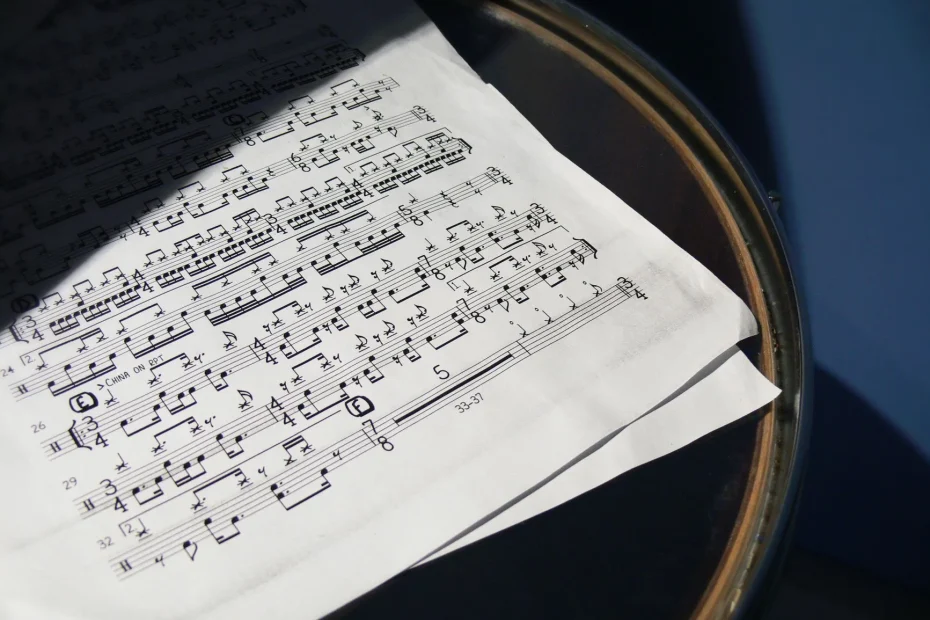
Discovering this instrument has never been easier. The tongue drum is quick to learn, requires no knowledge of music theory, and lets you play clear melodies from your first try.
This guide offers a step-by-step method: prepare the instrument, choose where to place it (on a table, on your thighs, or on a stand), and position the stickers and pads for good resonance.
You will alternate between mallets and finger playing to vary your attack. The advantages: few notes, no wrong notes, and quick progress thanks to visual markers.
A roadmap organizes each session minute by minute, with a metronome and sheet music to speed up learning. For more resources and a complete guide, see our dedicated page: how to play this drum.
Guide goal: play your first rhythms in under 30 minutes
Practical goal: establish a steady beat (60–80 BPM) and put together a short musical pattern in thirty minutes. This goal is simple and concrete for beginners.
The method has three ten-minute blocks: ten minutes keeping time with a metronome, ten minutes practicing a few notes, and ten minutes putting together a mini-melody.
Consistency matters: ten minutes a day is enough to notice quick progress. Learning relies on visual cues (stickers) and listening cues (hearing the sustain) to save time.
- Progression: controlled strikes → alternating hands → rhythmic patterns.
- Results: feel the beat, know where a few notes are, and play 2 to 3 patterns.
- Resources: short scores and videos that make the guided method easier to understand.
By following this guide, you will turn short practice sessions into measurable progress and enjoy playing from your first session.
Prepare the instrument: note markers, position, and optimal resonance
Clear note markers and a suitable support improve your instrument’s sound. Before playing, take a few simple steps to improve resonance and note quality.
Place note stickers so you can find notes quickly
Follow the diagram in the booklet to align each sticker with its corresponding tongue.
Place the stickers on the player’s side so you can read them without covering the cuts. This makes notes easier to identify and speeds up learning.
Choose where to place the drum: table, thighs, or dedicated stand
On a table or the floor, use rubber pads to keep it stable. On your thighs, tilt the drum slightly toward you and distribute its weight between your legs.
A wooden or metal stand gives you even access to the notes and lets you play standing up without losing your balance.

Pads, donut cushion, and stand: preserve the resonating body
Pads are essential: without them, resonance and sustain decrease on a hard surface.
A donut cushion is useful if it is the right size; otherwise, it obstructs the tongues and changes the sound.
- Check that no part of the support touches the shell.
- Keep the center of gravity balanced and tilt the instrument slightly toward you.
- Before adjusting the tuning, correct the instrument’s position: poor positioning can make it seem out of tune.
Tip: reliable stands, such as those from Meinl or BeatRoot, provide stability and access to low notes, improving sound quality as soon as you set up.
Position and ergonomics: set up your body for fluid playing
Good posture makes every note easier to reach and protects your body while you practice. Sit on a stable chair or cross-legged, with your back straight and shoulders relaxed.
Seating, height, and tilt
Place the drum in the center of your thighs, with its edge unobstructed and tilted slightly toward you so you can see every tongue. Avoid pressing it against your stomach: that blocks access to nearby notes and hinders resonance.
Stability, wrist mobility, and relaxation
Align your wrists with the edges of the tongues to reduce fatigue and improve the quality of your strikes. Favor movements of the forearms and wrists over large shoulder movements.
Short routine: keep your elbows close to your body, breathe naturally, and take brief breaks every 10 to 15 minutes to relax your hands.
Quick check before each session: support stability, note visibility, and tilt. Good posture makes technique easier, protects your body, and smooths transitions.
Understand the sound: striking zones, sustain, and note control
Understanding how each striking zone shapes the tone helps you control your playing. Striking the center of a tongue produces a full, balanced sound. Near the edge, the sound becomes brighter and projects more.
Simple A/B test: strike the same note twice, first in the center and then near the edge, and compare the tone, projection, and dynamics.
Stop a note: damping and palm muting
To stop the sustain, gently place a fingertip on the tongue or use your palm (palm mute). This technique creates clear silences and makes phrasing more distinct.
Resonance, tuning, and environment
Resonance and tuning vary with materials and temperature. Let the instrument adjust to the room before checking its tuning.
- Strike with consistent force to compare the effects.
- Use your fingers to damp the sound precisely between closely spaced strikes.
- Alternate sustained and damped notes to create articulated patterns.
“Listen carefully to the sustain to time the space between notes and shape your musical phrase.”
For more on the basics and listening exercises, see our practical guide: beginner method and exercises.
Mallets: grip, rebound, and your first sequences
Holding the mallets properly immediately improves note clarity. Use a relaxed grip: your curved index finger guides the mallet, your thumb rests against it, and your other fingers follow the handle without squeezing. This encourages a natural rebound and clean notes.
Angle each strike at about 45° to optimize contact with the tongue. An angle that is too flat flattens the sound; one that is too upright cuts off the sustain.

Exercises and dynamic control
Start by alternating right and left hands on two neighboring notes. Aim for 4 to 8 clean strikes before speeding up.
Practice dynamics by keeping the same motion but changing how high you raise the mallets. This teaches you to control volume without changing technique.
Falling rain: play a series of light, even rebounds to feel the beat and steady the rhythm.
| Head type | Character | Recommended use |
|---|---|---|
| Nylon | Bright attack, short sustain | Reverberant rooms, precise rhythmic patterns |
| Felt | Round tone, long resonance | Dry rooms, gentle melodic playing |
| Mixed | Balance between attack and resonance | Versatile use, practice sessions |
Film 20 seconds of your playing to check hand symmetry, striking angle, and posture. Set a simple goal: play clean patterns, then gradually increase the tempo.
Play with your hands: brief impact, precision, and polyphony
Playing with your fingers changes your relationship with the drum: each impact becomes brief, precise, and highly expressive. This technique calls for controlled movement to preserve each tongue’s sustain.

The finger-joint snap
Movement: make a quick wrist motion. Your finger joint touches the tongue, then lifts away immediately. Goal: prevent your finger from lingering on the tongue and muting the sound.
Precision and efficient movement
Aim for the same spot on each tongue to produce a consistent tone. Alternate your index and middle fingers to spread the effort.
Use less force and more speed at impact: that is the key to clear notes without pain.
Simple polyphony (2 to 3 notes)
Start by slowly playing two notes at the same time. This creates harmonized melodies that are easy to remember.
Sometimes combine a sustained mallet note with a finger strike to enrich the tone.
“Practice in short sets and take breaks: rest also helps develop precision.”
| Aspect | Advice | Result |
|---|---|---|
| Movement | Quick finger-joint strike, immediate release | Preserved sustain |
| Precision | Consistent striking zone, alternating fingers | Consistent tone |
| Polyphony | Start by playing 2 to 3 notes slowly | Simple harmonies |
Tongue drum tutorial: your first rhythms in minutes
Set a metronome and feel the beat before playing notes. A tempo of 60 to 80 BPM helps steady your movements and build confidence.
Establish the beat: a metronome at 60–80 BPM and alternating hands
Start on a single note. Alternate hands, right then left, on every beat to establish the rhythm.
Practice in sets of 3 to 5 minutes to make the alternation automatic without tiring yourself.
Basic patterns: quarter notes, eighth notes, and your first syncopations
Build a simple pattern: 2 beats of quarter notes, then 2 beats of eighth notes.
Add a slight syncopation on the third beat to create interest.
Put together mini-melodies: singable patterns of 4 to 8 beats
Choose 3 or 4 nearby notes and repeat a phrase of 4 to 8 beats.
Use mallets for the foundation and fingers to add nuance to a transition. Let notes ring between strikes to preserve the sustain.
“Work in short sequences and take time to listen: guided repetition develops your ear and muscle memory.”
- Move your hands to neighboring notes every 4 beats so your eyes become accustomed to locating the tongues.
- Finish with a short recording to check the steadiness and balance of your playing.
| Goal | Tempo | Duration | Expected result |
|---|---|---|---|
| Establish the beat | 60–80 BPM | 3 to 5 minutes | Steady beat |
| Rhythmic pattern | 60–80 BPM | 3 to 5 minutes | Automatic hand alternation |
| Mini-melody | 60–80 BPM | 5 to 8 minutes | Fluid phrase, preserved sustain |
Simple sheet music and melodies: learn without music theory
A number and color system lets you identify notes immediately. This code assigns a number or color to each tongue of the instrument.
Read numbered or color-coded notation and follow a beginner’s booklet
Zenko notation (numbers and colors) indicates pitch and duration (whole notes, eighth notes).
A well-designed booklet begins with simple note lengths and short phrases. Progression: learn each phrase, then put them together.
Where to find sheet music suited to your scale
Look for arrangements for your scale or specialized libraries. Websites and books offer music suited to pentatonic or diatonic scales.
Play familiar tunes to build confidence and consistency
Start with familiar melodies (Frère Jacques, Hallelujah) to strengthen your skills.
“Repeat slowly, phrase by phrase; speed will come with consistency.”
- Choose sheet music compatible with your scale.
- Practice for 5 to 10 minutes a day to remember the note markers.
- To go further, see our reading guide: read simplified sheet music.
Effects, styles, and progression: from wah-wah to improvisation
Learning to control the sound hole opens up many easy-to-create effects. This simple movement changes the resonance and transforms the sounds without changing the tuning.
Use the sound hole for a wah-wah effect
Place the instrument on your thighs. Partly cover the sound hole with one thigh, then uncover it in time to create a wah-wah effect. Synchronizing the opening with the beat helps you keep time.
Improvise with a pivot note and varied textures
Start slowly. Choose a central pivot note and play back and forth around it. Alternate mallets and fingers to vary the attack and create melodies with more varied textures.
- Triangular chords: strike a low note, then a middle note and a high note to create a clear chord.
- Improvisation framework: 2 minutes of exploration, 1 minute of a repeated pattern, 1 minute of variation, then make a recording.
- Vary the scales and rhythmic density to change the mood.
“Use just enough of the effect to support the music without overwhelming it.”
| Technique | Purpose | Practical advice |
|---|---|---|
| Sound-hole wah-wah effect | Change the resonance | Cover and uncover the sound hole in time against your thigh |
| Pivot note | Starting point for improvisation | Simple structure: move back and forth |
| Mallets and fingers | Textures and nuances | Alternate them to vary attack and sustain |
For guided exercises and a step-by-step improvisation method, see improvise step by step.
Care for and choose your instrument: quality, scales, and longevity
Good care extends your instrument’s life and preserves its sound quality. Clean it with a microfiber cloth and apply a suitable wax.
Cleaning, storage, and protection
Store the instrument at 40% humidity and between 18 and 22 °C to preserve its tuning. Use a padded case (Gator, Protection Racket) when traveling.
Add silica gel packets if you store it for a long time. At home, pads protect the shell and improve resonance.
Number of notes, diameter, and materials
For a wider range, aim for at least 11 notes and a diameter of about 30 cm: the sustain and low notes will be better.
Choose steel of an appropriate thickness and a stable finish to maintain its tuning over time.
Choosing a scale and sound character
A diatonic scale suits a varied Western repertoire.
Pentatonic or Akebono scales offer a meditative atmosphere without dissonance, ideal for improvisation.
| Criterion | Recommendation | Why |
|---|---|---|
| Notes | At least 11 | Melodic range and sustain |
| Diameter | About 30 cm | Deep low notes |
| Material | Thick steel | Stable tuning throughout the instrument’s life |
| Brands | Beat Root, Hapi, Metalsounds/Zenko, RAV Vast, Moozica | Reputation and quality |
| Support | Sturdy stand and pads | Comfort on stage and at home |
“Good care habits and an informed choice preserve musical quality.”
Resources to help you go further today
Watching a teacher play helps you understand movements and transitions immediately. Videos let you imitate the technique and check your striking angle and hand position.
Video tutorials and online lessons
Useful channels include MasterTheHandpan, David Charrier, DrumTec, Zenko Music, and PercuShop for structured lessons, webinars, and instrument reviews.
Useful apps
Perfect Ear for ear training, DrumTuner for tuning, and DrumPartitions for organizing your sheet music and tracking your progress.
Communities and daily practice
Join Reddit r/tonguedrum or the Facebook group Tongue Drum France to share recordings and receive feedback.
“Structure your session: 10 to 15 minutes of improvisation, 5 minutes of technique, and 5 minutes on a new pattern.”
- Build a small repertoire of 5 accessible pieces.
- Compare several reviews to assess the resonance of different instruments.
- Alternate mallets and fingers according to your musical goal.
Tip: follow a short reference guide to plan your practice day by day and reinforce what you have learned with a simple method.
Conclusion
End each session with a simple goal: establish a beat, play a pattern (quarter notes, eighth notes, syncopations), and put together a short phrase. A clear goal helps you progress in a short time and stay focused.
Roadmap: prepare the instrument, check your posture, explore striking zones, and control the sustain to articulate notes. These actions bring quick progress after a few short sets.
Vary your exercises: alternate mallets and fingers, try the wah-wah effect, and explore different scales. Record yourself and take notes to track how your playing develops.
Consistency: practicing a few times a week is enough to build habits. Keep listening, allow notes time to resonate, and cultivate expressive, intentional playing.